Sample It
This is the fun part. With your gear connected and your settings in place, the app does the recording for you.
Press Start Sampling
Click Start Sampling in the parameters panel.
The app now works through your note range automatically:
- It plays each note over MIDI at the velocity you configured.
- It records your instrument's audio for the duration you set.
- It moves to the next note and repeats — note by note, until the whole range is done.
You don't need to touch anything while it runs.
Watch the grid fill
On the right, the NoteCard grid shows one card per note. As sampling proceeds, each card moves through three states:
| State | Looks like | Meaning |
|---|---|---|
| Pending | Gray | Not recorded yet |
| In-progress | Pulsing cyan | Recording right now |
| Completed | Emerald | Done — sample captured |
Each card shows its own progress as its note records, so you can see the run advance.
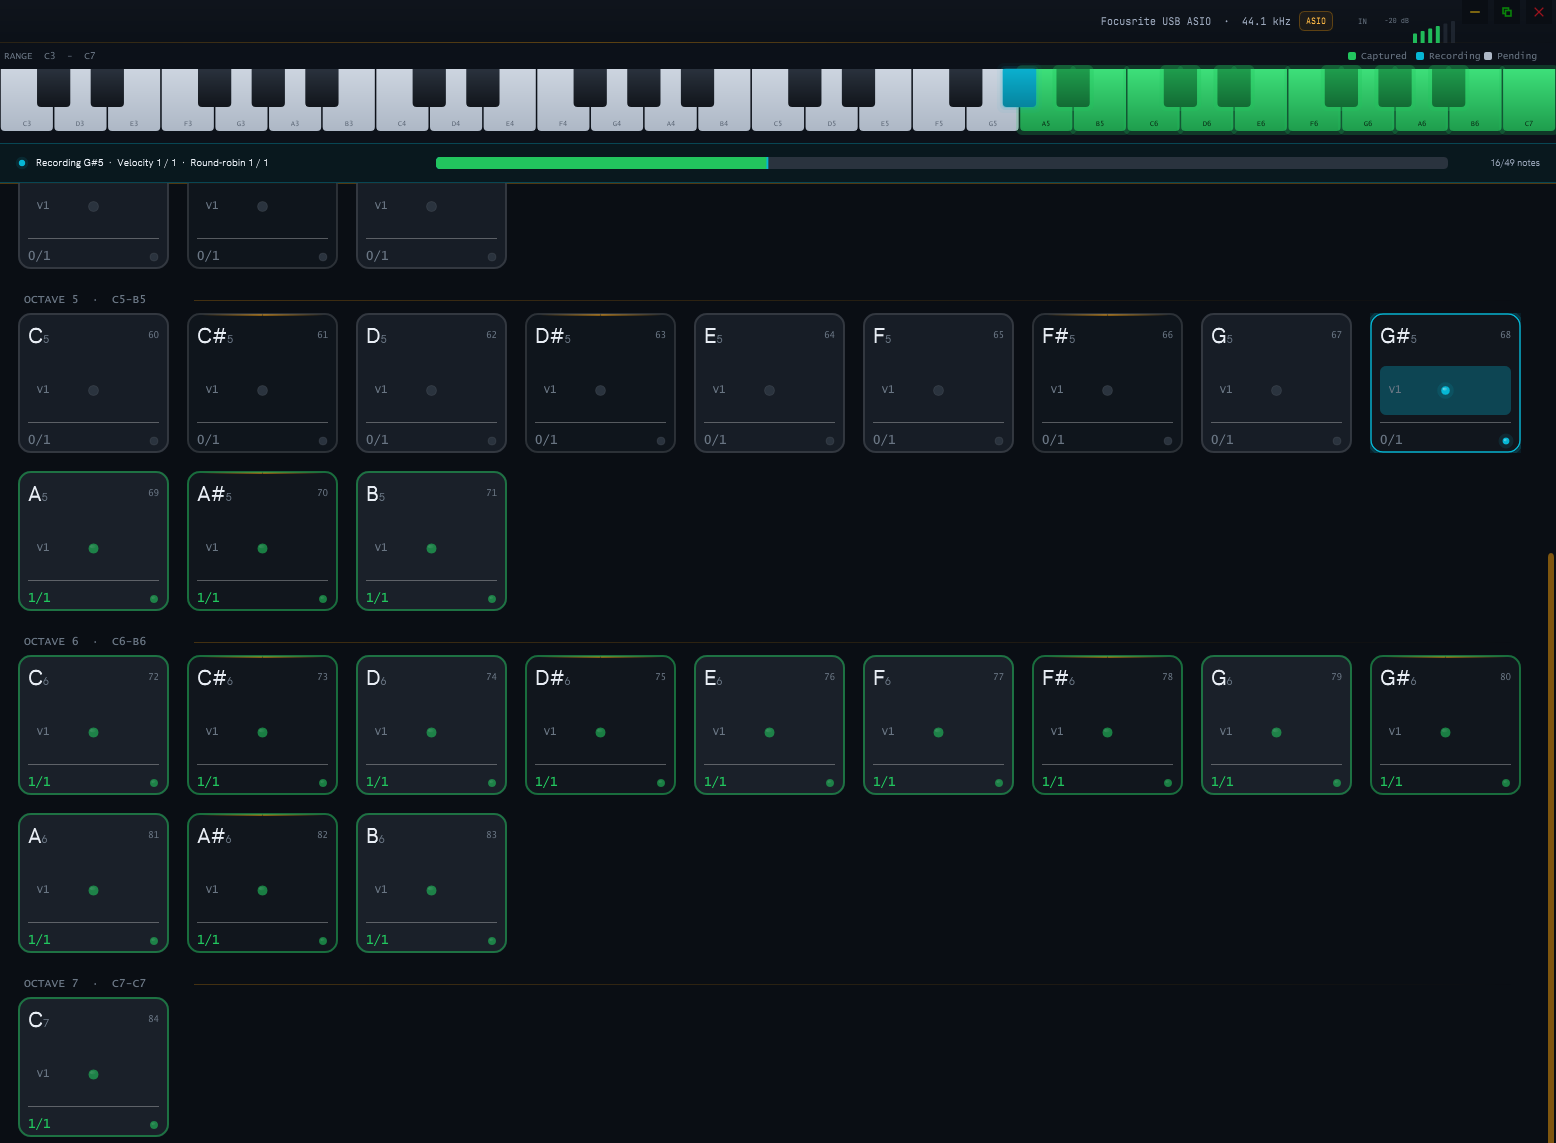
Listen back
When a card turns emerald, left-click it to audition the recorded sample through your output. Click through a few to confirm they sound right.
Something off?
-
Fine-tune individual notes from the grid — right-click a card to open its edit window and trim or reverse the take. See Editing Samples.
-
Learn everything the grid can do in The NoteCard Grid.
- Silent, clipped, or wrong-length samples? Check Troubleshooting.
Once the grid is all emerald, your instrument is recorded.
Next: export it
You've got a full set of samples. Last step — turn them into a playable instrument → Export It.