Editing Samples
After a run you'll often want to tidy individual takes — tighten the start, drop a long tail, or flip a sample around. The edit window lets you do this per sample, without re-recording or altering the original file.
Open the edit window
Right-click any card in the NoteCard grid to open the edit window for that sample.
What you can do
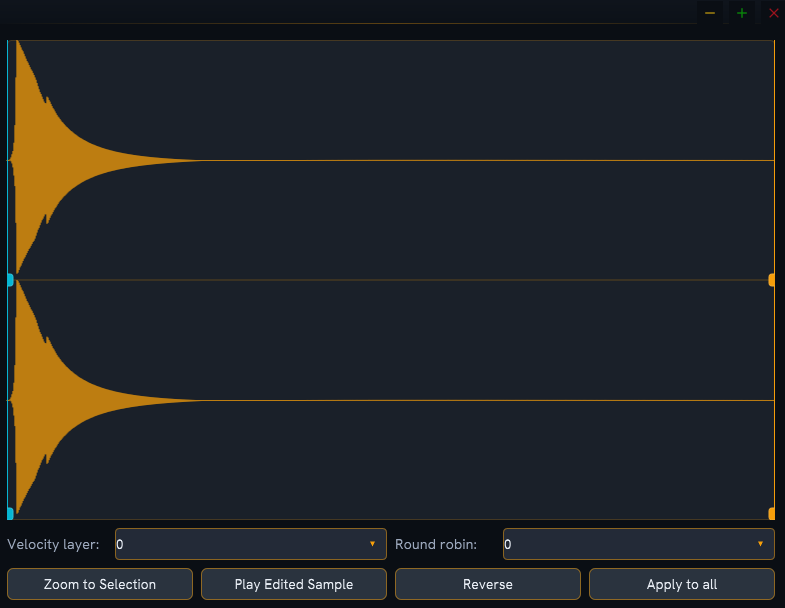
The edit window shows the sample's waveform with the controls below:
- Trim start / end — drag the start and end markers on the waveform to set exactly where the sample begins and ends. Use it to remove silence or count-in at the front and trim a long tail at the end.
- Reverse — flip the sample to play backwards.
- Play Edited Sample — audition the take with your current trim and reverse applied, so you can hear the result before committing.
- Zoom to Selection — zoom the waveform into the trimmed region for precise marker placement.
- Apply to all — apply the current trim settings to every sample at once. Handy when all your takes share the same lead-in (for example a consistent recording offset).
Edits are non-destructive
Your trim and reverse settings are stored per sample alongside the instrument — the
original recorded .wav on disk is never modified. The edits are remembered when you save the
session and are baked in only when you export (the exported copies are trimmed
and reversed as set).
Related
- Exporting Your Instrument — your trims are applied to the exported copies.